Friday, January 24, 2025
How to Build Wooden Picture Frames with Step-by-Step Instructions
Building Your Own Stunning Wooden Picture Frames: A Step-by-Step Guide
Hey there, fellow crafters! So you want to build your own picture frames? Awesome! It's a super rewarding project, and you get to personalize it completely. Forget those mass-produced frames â€" let's dive into creating something truly special and unique. This guide will walk you through everything, from choosing your wood to hanging your masterpiece on the wall.

1. Gathering Your Supplies: What You'll Need
Before we get our hands dirty (literally!), let's make sure we have all the necessary tools and materials. Don't worry, you probably already have some of these lying around!

Wood Selection: The Foundation of Your Frame
This is where you get to unleash your creativity! The type of wood you choose will drastically impact the look and feel of your finished frame. Think about the style you're going for:
- Pine: Inexpensive, readily available, and easy to work with. Great for beginners!
- Oak: A classic choice, known for its strength and beautiful grain. It's a bit more challenging to work with but yields gorgeous results.
- Cherry: Rich, reddish-brown tones make this wood a stunning option for elegant frames.
- Walnut: Dark and luxurious, walnut offers a sophisticated feel.
- Reclaimed Wood: Adds a rustic charm and a unique story to your frame. You can find this at salvage yards, flea markets or even in your own backyard (if you're lucky!).
Consider the size of your picture when selecting your wood. For smaller pictures, thinner wood will work perfectly. Larger pictures might require thicker pieces to ensure stability.
Tools of the Trade: Your Crafting Arsenal
You won't need a massive workshop to build these frames, but here's a list of essential tools:
- Measuring Tape and Pencil: For accurate measurements and marking.
- Miter Saw or Hand Saw: To cut the wood at precise angles.
- Clamps: To hold the wood securely during gluing and assembly.
- Wood Glue: A strong wood glue is essential for a lasting bond.
- Sandpaper (various grits): For smoothing the wood and achieving a flawless finish. Start with a coarser grit and work your way up to a finer grit for a super smooth surface.
- Wood Stain or Paint (optional): To add color and enhance the wood's natural beauty.
- Brushes or Rags: For applying stain or paint.
- Finishing Materials (optional): Polyurethane or varnish to protect your frame from moisture and wear.
- Picture Hanging Hardware: D-rings, sawtooth hangers, or wire depending on your preference.
- Screwdriver or Hammer (depending on your hardware): For attaching the hanging hardware.
2. Cutting the Wood: Precision is Key
Now for the fun part (or maybe the slightly more nerve-wracking part for beginners!). Accurate cutting is crucial for a professional-looking frame. Let's break it down:
Calculating the Wood Dimensions
First, measure the dimensions of your picture. Then, add the desired width of your frame to each side. This will give you the total length and width of the wood pieces you need to cut. For example, if your picture is 8x10 inches and you want a 2-inch frame, you'll need pieces that are 12 inches long and 14 inches wide.
Making the Cuts
Using your miter saw (or hand saw if that's what you're working with!), cut four pieces of wood at a 45-degree angle. Each cut should be perfectly precise to ensure the corners join seamlessly. If you're using a miter saw, use a jig to guarantee accurate angles every time!
Important Tip: Before making any cuts on your nice wood, practice on some scrap pieces to get comfortable with your tools and angles.
3. Assembling the Frame: Glue and Clamps to the Rescue
With all your pieces cut, it's time to bring them together! This is where those clamps come in handy.
Applying the Glue
Apply a thin, even bead of wood glue to the angled end of each piece. Don't overdo it â€" too much glue will squeeze out and make a mess.
Clamping and Drying
Carefully join the four pieces, making sure the corners are tight and aligned. Securely clamp them together. Let the glue dry completely according to the manufacturer's instructions (usually at least an hour or two).
4. Finishing Touches: Sanding, Staining, and Protecting
Once the glue is dry, remove the clamps and get ready for the finishing touches that will make your frame truly shine.
Sanding to Perfection
Start by sanding the entire frame with a coarser grit sandpaper. This removes any excess glue or rough edges. Gradually switch to finer grit sandpaper for a smoother, more polished finish. Always sand in the direction of the wood grain to avoid scratching.
Adding Color and Character
This is where you can really get creative! You can leave the wood natural, or stain it to complement your picture or your home decor. Apply the stain evenly with a brush or rag, following the manufacturer's instructions. Let the stain dry completely before proceeding.
Protecting Your Frame
To protect your beautiful frame from scratches, water damage, and general wear and tear, apply a clear sealant like polyurethane or varnish. This will also give your frame a nice sheen. Apply thin coats, allowing each coat to dry completely before applying the next.
5. Hanging Your Masterpiece
Finally, it's time to attach the hanging hardware. Choose the method that best suits your frame and wall: D-rings and wire, sawtooth hangers, or even simple hooks.
Frequently Asked Questions
Here are some common questions I often get about making wooden picture frames:
- Q: What's the best type of wood glue to use? A: A high-quality wood glue designed for interior use will work best. Look for brands that are known for their strength and bonding power.
- Q: How long should I let the glue dry? A: This will depend on the specific glue you are using, but generally you should allow at least an hour or two for a good bond.
- Q: Can I use a different angle other than 45 degrees? A: You can, but 45 degrees is the standard for a mitered frame. Other angles will create different visual effects.
- Q: What if my corners aren't perfect? A: Don't worry too much about minor imperfections! A little wood filler can easily fix any gaps. Just make sure it’s completely dry and sanded smooth before you stain or seal.
- Q: How do I choose the right hanging hardware? A: Consider the weight of your picture and frame when selecting the hardware. D-rings and wire are great for lighter frames, while sawtooth hangers are better for heavier ones.
- Q: Can I use this method for frames of any size? A: Yes, this method works for a variety of sizes. Just adjust your measurements accordingly. For extremely large frames, you may need to reinforce the joints with additional support.
There you have it! Now you're ready to create stunning, custom wooden picture frames. Remember to have fun with the process, and don't be afraid to experiment with different woods, stains, and finishes to create your own unique style. Happy crafting!

Console Table Plans with Drawers for Added Functionality
Console Table Plans with Drawers: Amp Up Your Entryway Style and Storage!
Hey there, fellow DIY enthusiasts! Let's talk about console tables. They're the unsung heroes of entryways, living rooms, and even hallways, offering a stylish spot to display your favorite things while providing much-needed storage. But what if you could take your console table game to the next level? What if, instead of just a surface for décor, you had a console table brimming with hidden storage? That's where adding drawers comes in!
Building a console table with drawers is a fantastic weekend project, and you’ll be surprised at how satisfying it is to create something beautiful and functional with your own two hands. This guide will walk you through the process, from planning to finishing touches, ensuring you end up with a piece you'll be proud to display in your home. Let’s dive in!

Planning Your Console Table Project

Choosing Your Style and Dimensions
Before you even think about grabbing your saw, take some time to envision your ideal console table. What style are you going for? Modern minimalist? Rustic farmhouse? Elegant traditional? The style will dictate your choice of wood, hardware, and overall design. Think about the space where it will live â€" measure the area carefully to determine the ideal dimensions for your table. Too big, and it will overwhelm the room. Too small, and it might look lost. A good starting point is to consider the width of your entryway or wall space.
Selecting Your Materials
The type of wood you choose significantly impacts the look and feel of your console table. Some popular choices include pine (affordable and easy to work with), oak (durable and classic), and mahogany (luxurious and rich). Consider the durability and finish you desire. For the drawers, plywood is a strong and cost-effective option. Don't forget about your hardware! Drawer pulls and knobs can dramatically change the overall aesthetic of your project. Shop around and find something that complements your chosen style.
Sketching Out Your Design
A simple sketch, even a rough one, is incredibly helpful. Draw out the basic dimensions of your table, including the height, width, and depth. Include the location of your drawers â€" how many? What size? Will they be centered, or offset? Pay attention to details like the leg design and the thickness of the tabletop. This visual plan will be your roadmap throughout the construction process.
Building Your Console Table: A Step-by-Step Guide
Constructing the Table Frame
This is where the real work begins! Start by cutting your lumber to the dimensions you've planned. Accurate cuts are crucial, so use a miter saw or a hand saw with a steady hand. Assemble the frame using wood glue and screws. Ensure all the corners are square and that the frame is sturdy and level. You can use a clamp to hold everything securely while the glue dries. Remember, precision is key here! A slightly inaccurate cut early on can lead to problems down the road.
Building the Drawers
Drawer construction requires careful attention to detail. Cut the sides, front, back, and bottom of your drawers from plywood. Assemble them using wood glue and screws or dowels for added strength. The drawers should slide smoothly, so make sure your cuts are precise and the joints are tight. You may want to use drawer slides (available at most hardware stores) for a professional-looking finish and easy operation. This is a great step to potentially pre-assemble to make the later stages easier.
Attaching the Drawers to the Frame
Once the drawers are built, you can attach them to the console table frame. This is where those drawer slides will come in handy! Follow the manufacturer’s instructions to install them correctly. Ensure the drawers slide smoothly and close flush with the table’s surface. Test them out multiple times to make sure everything works flawlessly. You may need to make slight adjustments depending on the tolerances of your cuts.
Adding the Tabletop
The tabletop is often the showpiece of a console table, so choose a beautiful piece of wood. You can use a single, wide plank or glue together several narrower boards to create a wider top. Use wood glue and clamps to secure the tabletop to the frame. Once the glue has dried, you can add finishing touches like sanding and staining or painting to achieve your desired look.
Finishing Touches
Once everything is assembled, it’s time for the finishing touches. Sand down any rough edges and imperfections. Apply stain or paint to match your style and protect the wood. Finally, attach your chosen hardware â€" drawer pulls and knobs â€" and admire your handiwork!
Choosing the Right Hardware
Don't underestimate the impact of hardware! The right knobs or pulls can elevate your console table from "nice" to "stunning." Consider the style of your table:
- Modern: Sleek, minimalist pulls or knobs in brushed nickel or black.
- Rustic: Distressed metal pulls or knobs with a vintage feel.
- Traditional: Ornate brass or crystal knobs.
Take your time to choose hardware that complements your console table’s design and overall aesthetic. Don't be afraid to experiment and find something that truly expresses your personal style.
Commonly Asked Questions
Q: What tools do I need to build a console table with drawers?
A: You'll need basic woodworking tools such as a saw (circular saw or miter saw is best), drill, screwdriver, measuring tape, clamps, sandpaper, and safety glasses.
Q: How long does it take to build a console table with drawers?
A: Depending on your experience level and the complexity of your design, building a console table with drawers can take anywhere from a weekend to a few weeks.
Q: Can I use different types of wood for the frame and drawers?
A: Yes, you can! You might choose a less expensive wood for the frame and a more attractive or durable wood for the tabletop and drawer fronts for a cost-effective approach.
Q: What kind of finish should I use?
A: The best finish depends on your desired look and the type of wood you're using. Options include paint, stain, polyurethane, and varnish. Research the best options for your chosen wood type and desired aesthetic.
Q: Can I adjust the plans to fit my space?
A: Absolutely! These plans are a guide, feel free to adjust the dimensions to perfectly fit your space and your personal preferences. That's the beauty of DIY!
There you have it! Building your own console table with drawers is a rewarding experience that adds both style and functionality to your home. Remember to plan carefully, take your time, and most importantly, have fun!
Affordable DIY Console Table Ideas for Budget-Friendly Projects
Affordable DIY Console Table Ideas for Budget-Friendly Projects
Transforming an entryway, hallway, or living room with a stylish console table can significantly enhance a space's aesthetic appeal. However, the cost of purchasing a pre-made console table can often be prohibitive. This article explores a range of affordable DIY console table projects, offering detailed instructions and cost-saving strategies for creating a unique and functional piece of furniture without breaking the bank.

Repurposing Existing Materials: The Foundation of Budget-Friendly Design
The key to creating an affordable DIY console table lies in intelligently repurposing existing materials. Instead of purchasing entirely new components, consider utilizing readily available items around the home or sourcing them inexpensively from secondhand stores, salvage yards, or online marketplaces. This approach not only minimizes costs but also promotes sustainable practices and reduces waste.

Utilizing Old Doors
A sturdy old door, whether salvaged from a renovation project or purchased cheaply from a salvage yard, makes an excellent foundation for a console table. The door's existing frame and panels provide a solid structure that requires minimal additional work. Simply add legs (which can be purchased inexpensively or crafted from readily available materials like wood scraps or even sturdy pipes), and a coat of paint or stain to customize the aesthetic to your preference. Consider adding decorative hardware, such as antique knobs or pulls, for an added touch of personality. This project requires basic woodworking skills, including measuring, cutting (if necessary), and attaching legs securely.
Transforming Pallets
Shipping pallets, often discarded by businesses, offer a readily available source of reclaimed wood. While requiring some careful disassembly and cleaning, pallets can form the basis of a rustic and charming console table. Sand down the wood to remove splinters and any rough edges, then consider staining or painting the pallets to match your existing décor. Legs can be attached to the cleaned and prepared pallet sections, creating a sturdy and visually appealing console table. Remember to check for any embedded nails or staples before handling the pallet wood.
Reimagining Old Drawers
Multiple old drawers, sourced from discarded dressers or chests, can be creatively arranged to construct a unique console table. Depending on their condition, you may need to sand and repaint the drawers. Securing them together with wood glue and screws creates a robust structure. Adding legs, either purchased or fashioned from wood scraps, completes the design. This method allows for considerable customization: drawers can be arranged in various configurations to suit the available space and desired aesthetic.
Crafting Your Console Table from Scratch: Cost-Effective Materials and Techniques
While repurposing existing materials is a highly cost-effective approach, creating a console table from scratch using inexpensive materials also presents a viable option. Careful planning and resourcefulness are crucial for keeping costs low while still achieving a desired aesthetic.
Working with Inexpensive Lumber
Construction-grade lumber, such as pine or fir, offers a budget-friendly alternative to more expensive hardwoods. These readily available options require minimal finishing but can be easily stained or painted to match your existing decor. Cutting the lumber to the desired dimensions and assembling it with wood glue and screws forms the table's basic structure. Adding simple legs, either purchased or crafted from the same lumber, completes the project.
Utilizing Alternative Leg Options
Instead of purchasing expensive pre-made legs, consider creative alternatives to minimize costs. Metal pipes, available from hardware stores, offer a modern and industrial aesthetic. Upcycled furniture legs can also provide a cost-effective and unique solution. Even strong wooden blocks, appropriately finished, can function as sturdy and attractive legs.
Simple and Stylish Design Choices
Opting for a straightforward and minimalist design can significantly reduce both material costs and construction complexity. Avoid overly intricate designs that require specialized tools or expensive materials. A simple rectangular or square tabletop with straight legs is both functional and visually appealing, requiring fewer materials and less woodworking expertise.
Enhancing the Visual Appeal: Budget-Friendly Finishing Techniques
Even the most cost-effective materials can be transformed into a visually striking piece of furniture with appropriate finishing techniques. Prioritizing affordability doesn't require sacrificing aesthetic appeal.
Choosing Cost-Effective Finishes
Rather than using expensive specialty paints or stains, consider using readily available alternatives. Milk paint offers a charming, rustic finish at a reasonable price. Chalk paint provides a matte finish that can be easily distressed for a vintage look. Simple stains are another affordable option for enhancing the natural wood grain.
DIY Distressing Techniques
Giving your console table a distressed or vintage look can add character and mask minor imperfections, further enhancing its charm. Techniques like sanding back edges, applying a glaze, or using a dry-brushing technique can create a unique and appealing aesthetic without significant additional cost.
Utilizing Affordable Hardware
Selecting affordable hardware completes the overall aesthetic. Explore thrift stores or online marketplaces for unique knobs and pulls that add personality without breaking the bank. Simple, inexpensive knobs can also provide a clean and minimalist look.
Conclusion: Unleashing Creativity and Resourcefulness
Creating an affordable DIY console table is a rewarding endeavor that combines creativity, resourcefulness, and cost-consciousness. By thoughtfully repurposing materials, utilizing inexpensive lumber and alternative leg options, and employing budget-friendly finishing techniques, one can craft a unique and functional piece of furniture that elevates any space without exceeding budgetary constraints. Remember that embracing simplicity and focusing on the inherent beauty of the materials themselves can lead to surprisingly elegant and satisfying results.
Multi-Photo Wooden Picture Frame Designs for Gallery Walls
Level Up Your Gallery Wall: Multi-Photo Wooden Picture Frame Designs
So, you're thinking about creating a gallery wall? Awesome! Gallery walls are a fantastic way to showcase your favorite memories and add personality to your home. But let's be honest, staring at a blank wall and a pile of frames can feel a little overwhelming. That's where multi-photo wooden picture frames come in â€" they’re a game-changer! Forget the hassle of meticulously arranging individual frames; these clever designs do the work for you, creating a cohesive and stylish look in a fraction of the time. Let's dive into the wonderful world of multi-photo wooden picture frames and how to use them to build the gallery wall of your dreams.

Why Choose Wooden Multi-Photo Frames?
There's something undeniably warm and inviting about wood. It adds a touch of rustic charm, a hint of elegance, or a dose of modern minimalism, depending on the style you choose. And with multi-photo frames, you get all that inherent charm multiplied! Here’s why they’re a top choice for gallery walls:

Versatility is Key
Wooden frames come in a huge variety of styles, colors, and finishes. From sleek, dark walnut to light, airy oak, you'll find a frame to match any décor. Want a farmhouse vibe? Choose a distressed whitewash frame. Going for a more modern aesthetic? A clean-lined black or gray frame is perfect. The possibilities are practically endless!
Durability and Longevity
Let's face it, we invest a lot of emotion in our photos. Wooden frames provide a robust and durable way to protect those precious memories. Unlike flimsy plastic or metal frames, a well-made wooden frame will stand the test of time, preserving your photos for years to come. Plus, a little wood polish now and then keeps them looking their best!
Easy to Style
The beauty of multi-photo wooden frames is their built-in cohesiveness. They inherently create a balanced and visually appealing display, even if you're not a design expert. This makes them a perfect choice for those who want a stunning gallery wall without the headache of meticulous individual frame placement.
Exploring Different Multi-Photo Frame Designs
The world of multi-photo wooden frames is vast and varied. Let's look at some of the popular designs to inspire your gallery wall creation:
The Classic Collage Frame
This is the quintessential multi-photo frame. Typically, it features a single, larger frame encompassing several smaller openings for individual photos. These can be arranged in various configurations â€" a grid, a staggered pattern, or even a more free-flowing design. The possibilities are endless, and you can easily tailor it to match your personal style.
The Connected Frames Design
Think of this as a more modern and sophisticated take on the collage. Instead of a single overarching frame, individual frames are connected by a shared backing or a visually connecting element, such as a piece of wood or metal. This gives a more artistic and less structured feel to the display.
The Branching Frame
This design resembles a tree with branches, each "branch" holding a single photo. These frames often incorporate more natural-looking wood and are a great choice for nature-themed photography or a rustic home style.
The Heart-Shaped Frame
Perfect for showcasing romantic photos or family portraits, a heart-shaped multi-photo frame is a unique and heartfelt way to display cherished memories. Often it features several smaller frames arranged within the larger heart shape.
Tips for Creating a Stunning Gallery Wall with Multi-Photo Wooden Frames
Ready to create your masterpiece? Here are a few helpful tips to ensure your gallery wall is as stunning as it can be:
Beyond the Basics: Adding Personal Touches
Once you've got your basic multi-photo frame gallery wall set up, there are tons of ways to personalize it even further!
Commonly Asked Questions
Here are some frequently asked questions about multi-photo wooden picture frames:
Q: Where can I buy multi-photo wooden picture frames?
A: You can find a wide selection of multi-photo wooden frames online (Etsy, Amazon, etc.) and in home décor stores. You may even find unique, handcrafted frames at local craft fairs or markets.
Q: How do I clean my wooden frames?
A: Dust regularly with a soft cloth. For more thorough cleaning, use a slightly damp cloth and a gentle wood cleaner. Always avoid harsh chemicals or abrasive cleaners.
Q: Can I customize the layout of the photos within the frame?
A: Some multi-photo frames offer flexibility in photo placement, while others have fixed layouts. Check the product description before purchasing to make sure it meets your needs.
Q: How do I hang a large multi-photo frame?
A: Large and heavy frames will require sturdy hanging hardware, such as heavy-duty picture wire or even multiple picture hooks. Always check the weight limit of the hardware before hanging.
With a little creativity and planning, creating a stunning gallery wall with multi-photo wooden frames is an achievable and rewarding project. Happy decorating!
Wednesday, November 20, 2024
Wooden Storage Bins with Dividers for Maximum Organization
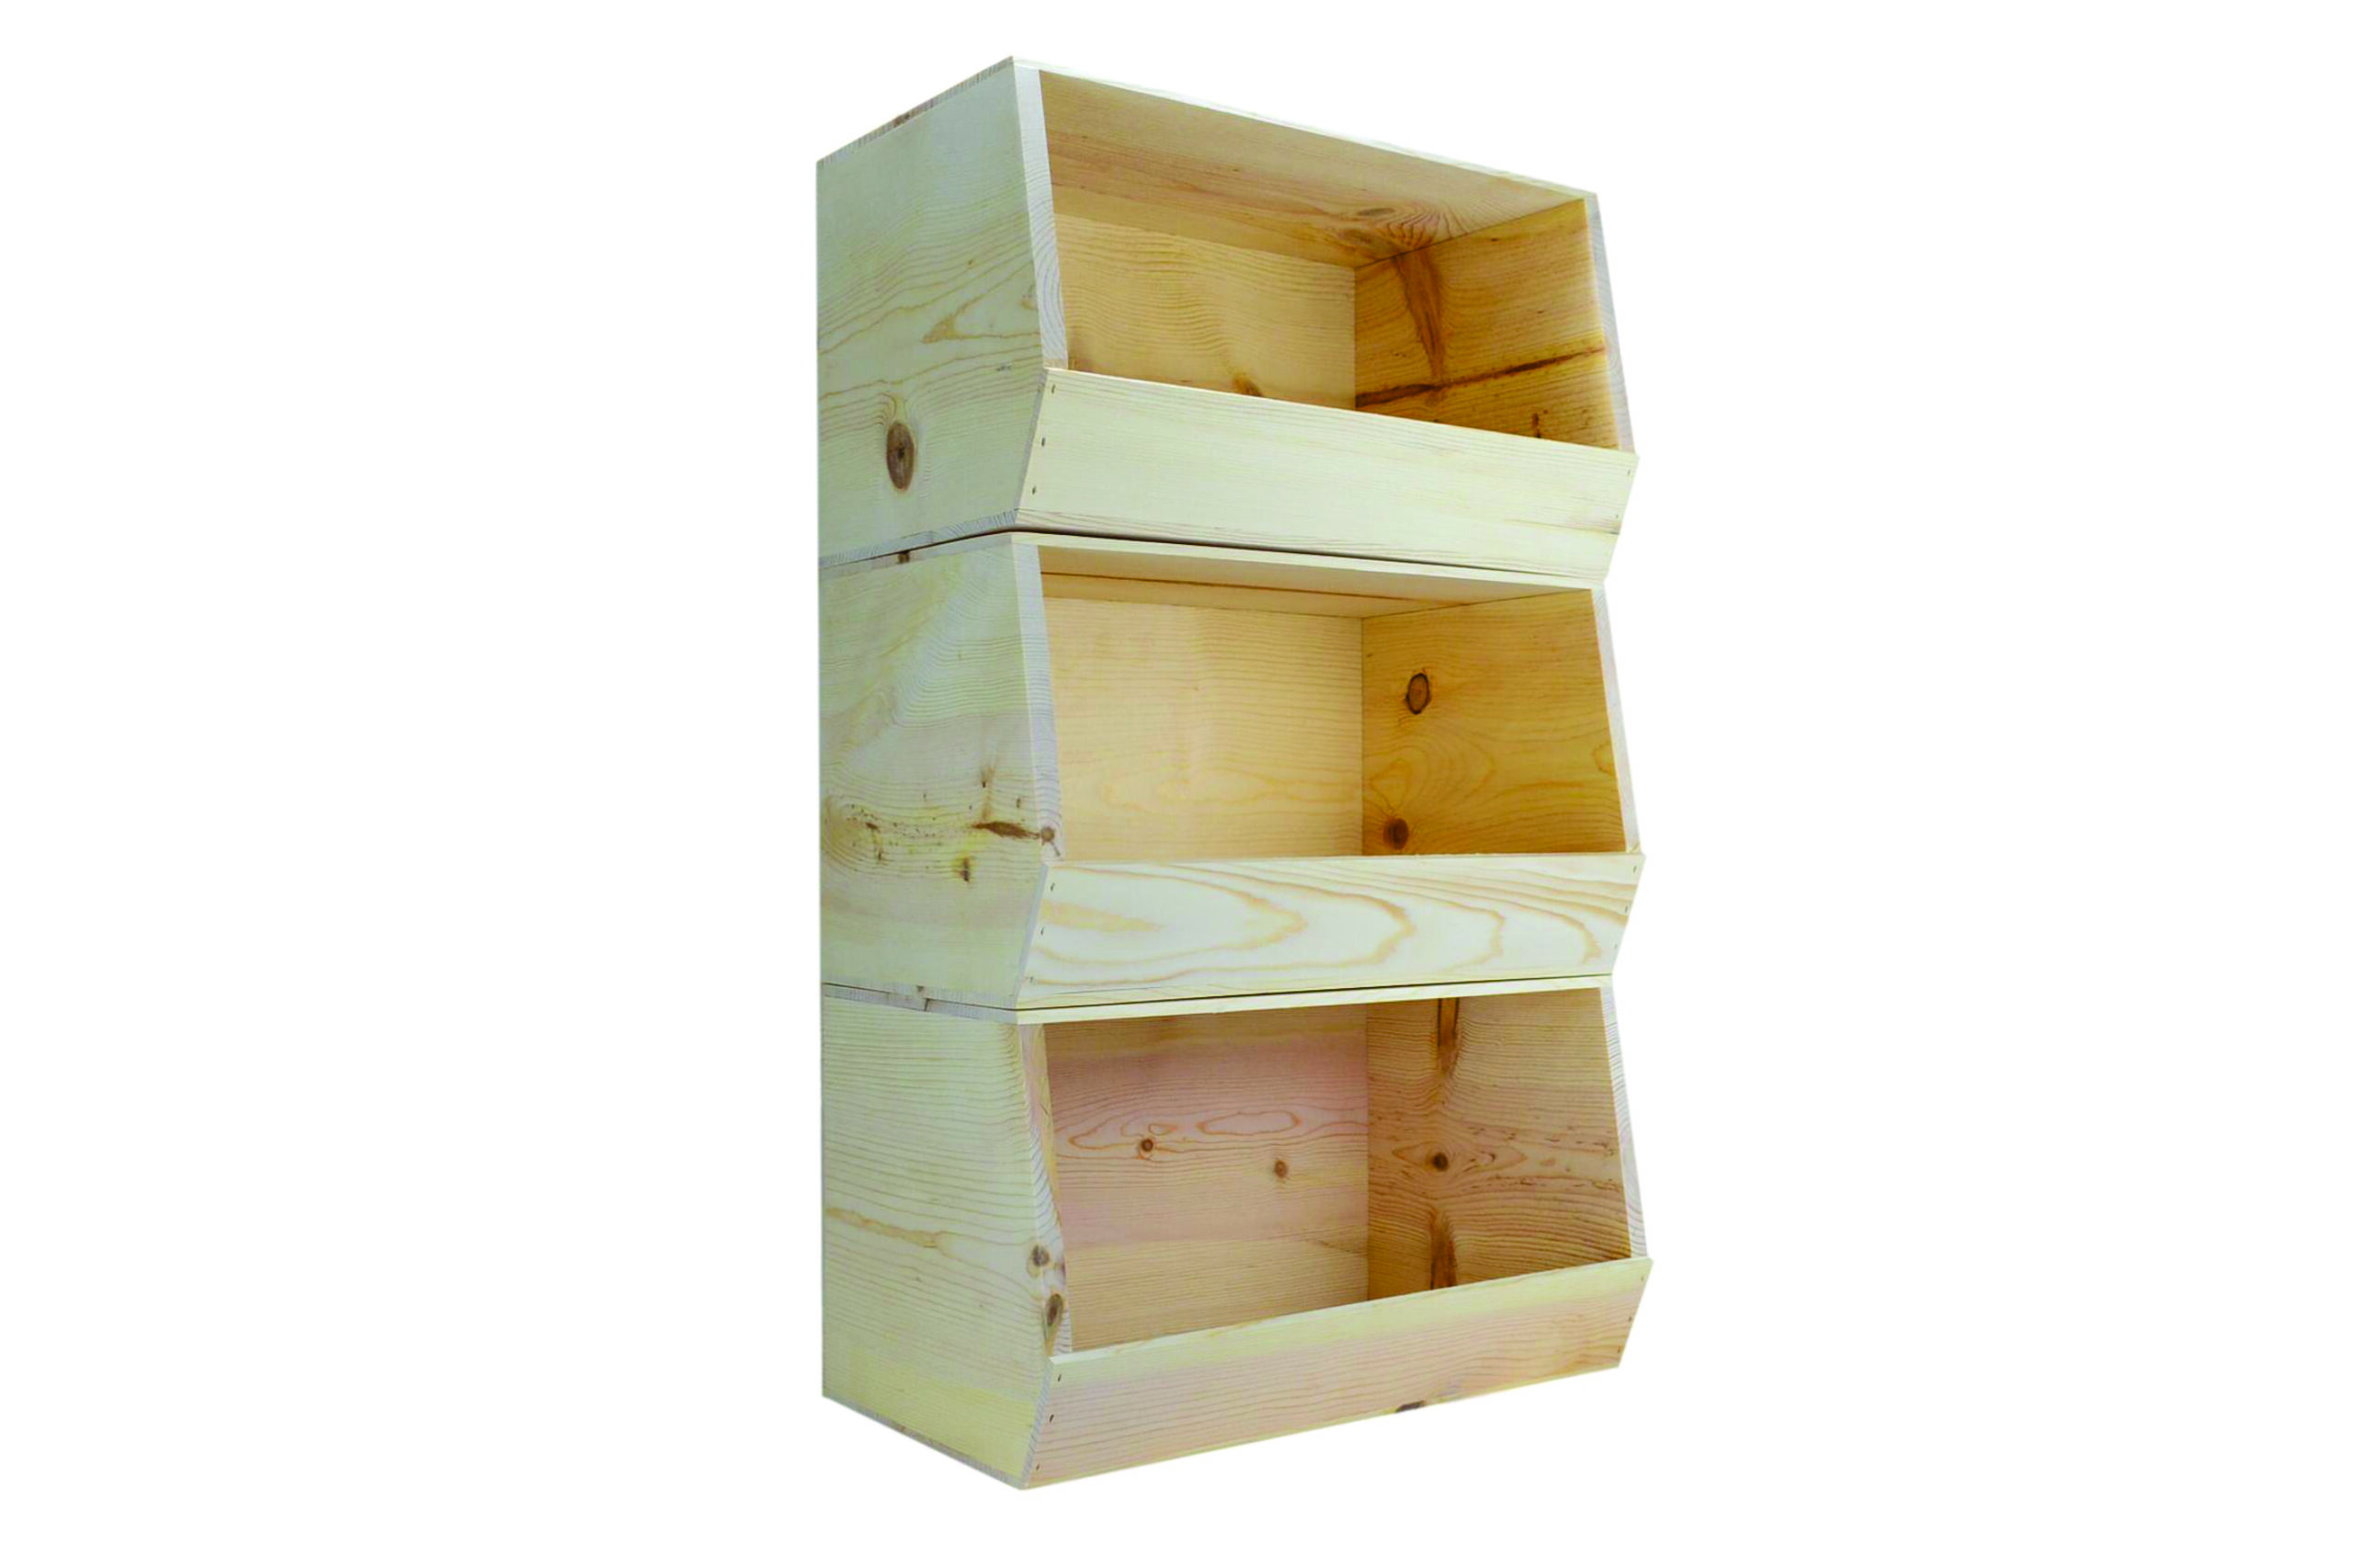
Wooden Storage Bins with Dividers: Your Ultimate Organization Solution
Let's face it, we all have that one drawer, closet, or shelf that seems to be a black hole of chaos. No matter how hard we try, it always ends up looking like a bomb went off in there. But what if there was a way to tame that chaos, a way to conquer clutter and finally enjoy a tidy, organized space? Enter the magnificent world of wooden storage bins with dividers!
These sturdy, stylish bins are more than just containers; they're your secret weapons in the battle against clutter. Imagine a world where your crafting supplies are neatly compartmentalized, your toiletries are separated and easily accessible, and your pantry staples are organized in a way that makes you feel like a culinary maestro. It's a dream come true, and with wooden storage bins with dividers, it's entirely achievable.
But what makes these bins so special? Why should you choose them over the plastic variety? Let's delve deeper and explore the wonderful world of organized living with wooden storage bins.
The Benefits of Choosing Wooden Storage Bins with Dividers
There's a reason why wooden storage bins have become a favorite among organization enthusiasts. They offer a plethora of benefits, both practical and aesthetic:
Durability and Longevity
Unlike flimsy plastic containers that crack and break easily, wooden storage bins are built to last. They can withstand the wear and tear of everyday use, ensuring that your belongings are safe and secure. Plus, they're resistant to moisture and odors, making them ideal for storing a wide range of items.
Natural Beauty and Timeless Style
Wooden storage bins have an undeniable charm that adds warmth and elegance to any space. Whether you prefer rustic, modern, or farmhouse style, there's a wood finish to match your aesthetic. They complement any decor, blending seamlessly into your existing furniture and creating a sense of cozy sophistication.
Versatility and Adaptability
Wooden storage bins are incredibly versatile. They can be used in any room of your home, from the bedroom to the kitchen to the bathroom. Their customizable design allows you to personalize your organization system, tailoring it to your specific needs. You can choose from various sizes and configurations to find the perfect fit for your belongings.
Enhanced Organization with Dividers
Here's where the magic truly happens. The dividers within these bins are the ultimate organization game-changer. They transform your storage space into a haven of order and efficiency. Imagine:
- A clutter-free pantry where your spices, snacks, and baking supplies are separated and easily accessible.
- A tidy craft room where your paints, brushes, and embellishments are neatly categorized.
- An organized bathroom where your toiletries are separated and your makeup is within easy reach.
With dividers, you can create distinct compartments for each item, ensuring that everything has its designated spot. No more digging through piles of mismatched items!
Choosing the Perfect Wooden Storage Bins with Dividers
With so many options available, choosing the right wooden storage bins with dividers can seem overwhelming. Here are some key considerations to keep in mind:
Size and Capacity
Consider the size and capacity of the bins you need. If you're storing bulky items like blankets or winter clothes, you'll need larger bins. Smaller bins are perfect for organizing smaller items like toiletries, craft supplies, or office supplies.
Material and Finish
Choose a wood that complements your existing decor and meets your needs. Some popular options include pine, cedar, and oak. Consider the finish too, whether you prefer a natural look or a stained or painted finish.
Dividers and Compartments
Think about the number of dividers you need and the configuration that best suits your storage needs. Some bins come with pre-installed dividers, while others allow you to add your own. You can even find bins with adjustable dividers to create customized compartments.
Style and Design
Select a style that complements your existing decor and reflects your personal preferences. From rustic to modern, there are endless options available. Some bins have handles for easy carrying, while others feature lid options for added security.
Creative Ways to Use Wooden Storage Bins with Dividers
The applications for wooden storage bins with dividers are endless! Here are some creative ideas to spark your imagination:
- Organize your office supplies: Separate your pens, pencils, paper clips, and other office essentials into distinct compartments for a tidy workspace.
- Store your craft supplies: Keep your crafting materials organized and easily accessible for a more enjoyable and productive creative experience.
- Tame your pantry chaos: Create designated compartments for your spices, snacks, baking supplies, and other pantry essentials.
- Organize your bathroom toiletries: Separate your shampoos, conditioners, soaps, and other bathroom essentials for a neat and spa-like environment.
- Create a toy storage solution: Keep your child's toys organized and easily accessible for effortless cleanup and endless playtime.
- Store your clothing and accessories: Organize your wardrobe by separating your clothes into different categories for easy access.
Frequently Asked Questions
Here are some common questions about wooden storage bins with dividers:
Q: Are wooden storage bins with dividers expensive?
A: The price of wooden storage bins with dividers varies depending on factors such as size, material, and design. You can find affordable options for basic needs, and more premium bins for those seeking high-quality materials and craftsmanship.
Q: How do I clean wooden storage bins?
A: Most wooden storage bins can be cleaned with a damp cloth and mild soap. Avoid using harsh chemicals or abrasives that can damage the wood.
Q: Can I paint or stain wooden storage bins?
A: Absolutely! You can paint or stain wooden storage bins to match your decor or personalize their appearance. Choose a paint or stain that is suitable for wood surfaces.
Q: Where can I buy wooden storage bins with dividers?
A: Wooden storage bins with dividers are widely available online and in home goods stores. You can find a variety of options to suit your needs and budget.
With their durability, style, and organizational prowess, wooden storage bins with dividers are the ultimate solution to conquer clutter and create a beautifully organized space. Embrace the power of order and transform your home into a haven of tranquility and efficiency.
Tuesday, November 19, 2024
How to Build Wooden Chess Tables with a Rustic or Modern Look

Building Wooden Chess Tables: Rustic and Modern Styles
Crafting a wooden chess table is a rewarding endeavor that blends artistry with functionality. It's a project that allows you to personalize your home with a unique piece, bringing a touch of elegance to your game nights. This article will guide you through the process of constructing a chess table, focusing on both rustic and modern aesthetics.
Choosing the Right Wood
The heart of any chess table lies in the wood you choose. The character of the wood will significantly influence the final look and feel of your creation. For a rustic vibe, consider using reclaimed wood, rough-cut lumber, or knotty pine. These options boast natural imperfections that add character and warmth. For a modern aesthetic, opt for hardwoods like maple, walnut, or cherry. These woods offer a clean, polished look and a refined feel.
Designing Your Chess Table
Before you start cutting, take some time to design your table. Consider these factors:
- Size: Decide on the dimensions that best suit your space and your playing style.
- Shape: A traditional rectangular table is a classic choice, but you can experiment with circular, oval, or even hexagonal designs.
- Height: Adjust the height to ensure comfortable play. A standard height for chess tables is around 29 inches.
- Storage: Include drawers or shelves for storing your chess set, game pieces, and other accessories.
- Style: Choose elements that reflect your desired aesthetic, such as rustic metal accents, sleek modern lines, or intricate carvings.
Building the Rustic Chess Table
For a rustic chess table, emphasize the natural beauty of the wood. Here's a step-by-step guide:
1. Prepare the Lumber
Roughly cut the wood to your desired size. Embrace the knots and imperfections for a truly rustic look. Use a belt sander to smooth the edges and create a consistent surface.
2. Construct the Frame
Use mortise-and-tenon joinery or strong pocket-hole screws to assemble the frame. Leave the wood slightly rough for a rustic feel.
3. Add the Top
Attach the table top to the frame, leaving the edges slightly uneven for an authentic rustic touch.
4. Finish and Protect
Sand the table with progressively finer grit sandpaper. Apply a natural oil-based finish to enhance the wood's grain and protect it from wear and tear. Avoid using a high-gloss finish as it can detract from the rustic aesthetic.
Building the Modern Chess Table
A modern chess table prioritizes clean lines and a sleek, minimalist design. Here's how to achieve it:
1. Precise Cutting and Assembly
Use a table saw or chop saw for precise cuts. Create smooth, straight lines and accurate angles. Assemble the frame using strong joinery techniques like dovetails or dados for a sturdy, clean construction.
2. Polished Top
Sand the table top with increasingly fine grit sandpaper to achieve a perfectly smooth surface. Use a router to create subtle chamfered edges for a contemporary feel.
3. Modern Finish
Apply a clear, satin or semi-gloss finish to enhance the wood's natural beauty without obscuring the clean lines. Avoid a high-gloss finish, as it can create an overly shiny look.
Adding Details
Whether you're going for rustic or modern, consider adding details that elevate your chess table:
- Chess Board Inlay: For a truly personalized touch, incorporate a chessboard inlay into the table top. Use contrasting wood species for a striking visual effect.
- Storage Solutions: Integrate drawers, shelves, or a hidden compartment for storing chess pieces, books, or other accessories.
- Metal Accents: Add rustic iron hardware, modern metal legs, or sleek brass hinges for a touch of sophistication.
- Carving or Etching: For a unique touch, consider carving or etching decorative patterns into the table top or sides.
Final Touches
Once your chess table is built, take your time to enjoy your creation. Position it in a prominent spot in your home, where it can serve as a conversation starter and a reminder of your craftsmanship. Enjoy playing games and creating memories around your personalized chess table.
Monday, November 18, 2024
Free Woodworking Plans That Every Beginner Can Tackle

Free Woodworking Plans That Every Beginner Can Tackle
So, you're thinking about dipping your toes into the wonderful world of woodworking? That's awesome! It's a super rewarding hobby that lets you create amazing things from scratch. But where do you start? Don't worry, I've got you covered. Let's dive into some fantastic, free woodworking plans that are perfect for beginners.
Simple and Satisfying Projects
You don't need to start with a complex, multi-step project to get a sense of accomplishment. Here are a few beginner-friendly ideas that are quick, easy, and leave you feeling proud of your handiwork:
1. Wooden Coasters
Coasters are a great way to practice basic cuts, sanding, and finishing techniques. You can find tons of free plans online for simple square, round, or even more intricate designs. Use scrap wood or get some inexpensive hardwood to start. Once you've mastered the basics, you can even try adding decorative elements like inlays or burned designs.
2. Small Storage Box
A small storage box is a super practical project. You can use it for jewelry, craft supplies, or even just to tidy up your desk. The beauty of this project is that you can customize the size and shape to fit your needs. There are loads of free plans out there for different styles, from rustic to modern.
3. Birdhouse
Building a birdhouse is a classic beginner woodworking project that brings a touch of nature to your backyard. It's a great opportunity to get familiar with basic woodworking tools and techniques. There are endless variations of birdhouses you can build, from simple to intricate, so find one that appeals to you.
4. Picture Frame
A picture frame is a great way to showcase your favorite photos or artwork. It's also a perfect project to learn how to join pieces of wood together using miter joints. You can find free plans online for different shapes and sizes, and even experiment with different wood finishes to match your decor.
Stepping Up Your Skills
Once you've gained some confidence with the basics, you can start tackling projects with a bit more complexity. Here are some options that will test your skills and expand your woodworking repertoire:
5. Wooden Cutting Board
A cutting board is a must-have for any kitchen. You can find free plans for different shapes and sizes, from simple rectangular boards to more elaborate designs. This project will teach you about working with different wood types, including hardwoods like maple or walnut, and how to create a food-safe finish.
6. Simple Shelf Unit
Building a shelf unit is a practical project that allows you to showcase your favorite items or organize your home. You can find free plans for simple shelf units that require minimal tools and woodworking knowledge. As you become more comfortable, you can try building more elaborate shelf designs with decorative elements.
7. Wooden Wall Clock
A wall clock is a unique and eye-catching project that combines woodworking with some basic clock-making skills. You can find free plans online for a variety of styles, from rustic to modern. You'll learn how to use wood for different purposes, like creating the clock face and hands.
8. Small Wooden Table
Building a small table is a rewarding project that lets you create a functional piece of furniture for your home. You can find free plans for simple end tables, coffee tables, or even a small dining table. This project will introduce you to basic joinery techniques, like dowel joints and mortise and tenon joints.
Getting Started: Resources for Free Woodworking Plans
You might be thinking, "Where can I find these free plans?". It's easier than you think! The internet is your best friend in the world of woodworking. Here are some websites that are absolutely brimming with free woodworking plans:
- Ana White: A go-to for beginners, Ana White's website is packed with detailed plans, tutorials, and even videos. She offers a vast range of projects, from simple to more complex.
- The Woodworking for Mere Mortals website: This site is known for its beginner-friendly approach. You'll find plans for all kinds of projects, with clear instructions and helpful tips.
- Woodworkers Guild of America: This organization offers a free plan library, which features a wide variety of woodworking projects, many with beginner-friendly options.
- Pinterest: A great resource for inspiration, Pinterest has a wealth of free woodworking plans and tutorials. Search for specific projects or browse through categories like "DIY woodworking" or "easy woodworking projects."
- YouTube: Many woodworking YouTubers offer free plans and tutorials. Search for specific projects or browse through channels like "Woodworking for Mere Mortals" or "Ana White."
Tips for Success as a Beginner Woodworker
Ready to start building? Here are a few essential tips to keep in mind as you embark on your woodworking journey:
- Start small and simple: Don't get overwhelmed by complex projects right away. Choose something manageable and build your skills gradually.
- Read the plans carefully: Before you start cutting wood, take the time to understand the plans thoroughly. Pay attention to measurements, material lists, and step-by-step instructions.
- Safety first!: Woodworking involves tools that can be dangerous if not used properly. Always wear safety glasses, ear protection, and a dust mask.
- Don't be afraid to ask for help: If you encounter a problem, don't hesitate to ask for help from more experienced woodworkers. There are plenty of online communities and forums where you can get advice and support.
- Have fun!: Most importantly, enjoy the process. Woodworking is a rewarding hobby that can be incredibly satisfying.
Commonly Asked Questions
What tools do I need to get started with woodworking?
You don't need a ton of fancy equipment to start. A basic set of woodworking tools is sufficient for many beginner projects. Here's a list of essential tools to get you started:
- Hand saw: For making basic cuts.
- Measuring tape: To ensure your cuts are accurate.
- Pencil: For marking your cuts and layout.
- Hammer: For driving nails and other fasteners.
- Screwdriver: For driving screws.
- Sandpaper: For smoothing out surfaces and removing imperfections.
- Safety glasses: To protect your eyes from flying debris.
- Dust mask: To protect your lungs from wood dust.
Where can I buy wood for my projects?
You can buy wood at most home improvement stores, lumberyards, or even online retailers. If you're just starting, ask for recommendations from experienced woodworkers.
What kind of wood is best for beginners?
Softwoods like pine and fir are generally easier to work with than hardwoods. They're also more affordable. As you gain experience, you can experiment with hardwoods like oak, maple, or walnut.
What's the best way to learn woodworking?
There are many ways to learn woodworking. You can take classes, watch online tutorials, read books, or even join a woodworking club. The best way to learn is to find a method that works best for you and to practice, practice, practice!